My Project: Travel time bot with Google Maps API and Python - Part 2 - Making the travel data useful
In Part 1 of this series, I showed you how I found the travel time data I wanted and how I figured out how JSON data files function and how to pull out just the data I need. Now that I have this data, I needed to learn a bit of Python coding to extract is and use it in calculations and present it to the screen and other in other ways.
Learning Python

As has been the case throughout my technology work history, I learn on-demand. For me, this means coming up against a problem and then researching how to solve that problem on the Internet, adapting sample code and finally getting it all to work. That was exactly what happened in the project. I was not very familiar with Python, so each time I needed to accomplish a task I would head over to Google Search (which almost always led to me Stack Overflow) to find the answer.
Let me walk you through my Python code and explain how it works and a little about how I developed it.
Learn more about Python with these books from Amazon.com


Python Modules
Let’s begin at the top. First, I needed to figure out what Python modules I would need to accomplish all I wanted with the Travel Time program.
#!/usr/bin/env python
import urllib
import simplejson
from os import system
import os
import time
The urllib module gave me the tools to access web URLs within the program and request web pages — or in this case — a JSON file served up from the Google Maps API server.
simplejson — as you might imagine — provided the code to easily manipulate JSON by converting it into easily accessible arrays of information.
os and system modules allow me to call on basic operating system utilities like curl and — since I am running on a Mac — say, which speaks the information out loud.
The time module provides me the ability to add wait times and get the current data and time. Looking back at the code now, I realize I don’t really use it in this version. I originally had the script set to run every 5 minutes or so, instead of on-demand, so that functionality is not longer needed.
Getting the JSON Data

Next, it was time to get the actual current JSON data from the Google Maps API. Each time this is called, it returns the current travel time based on distance and also traffic loading.
Note: I have removed my own personal API key from the URL. You’ll need to add that in in — along with your start and end coordinates — to make this useful to you.
# Google Maps API URL
api_url = 'https://maps.googleapis.com/maps/api/directions/json?origin=34.178026,-118.4528837&destination=34.057835,-117.8217123&departure_time=now&key=<INSERTKEYHERE>
# Get JSON data from Google Maps API
response = urllib.urlopen(api_url)
data = simplejson.load(response)
The api-url variable is simply an easily modifiable placeholder for the url you might use. This is then used to in the call to urllib to pull the actual data from that API url. Note that I have no error checking in whether this actually succeeded or not. This is something you would probably want to add.
The data returned by the urllib call is stuffed into a variable called response. This response variable is then used in the call to simplejson which creates an array called data which has all the various key-value pairs sorted out and made easily accessible. My initial version of the program used simple text commands to hack away at the data I needed and was much more difficult and brute force. Once I learned how simplejson worked, though. it open the doors to not only accessing API data for this program, but any API data in JSON format from any API. This was a big step in my learning, for sure.
Finding the data I needed in the simplejson array
# Get current duration of trip duration = (data['routes'][0]['legs'][0]['duration_in_traffic']['value']) # Get current summary name for trip desc = (data['routes'][0]['summary'])
You may remember from Part 1 how I used the JSONViewer to give me a clearer, hierarchical understanding of the returned JSON file. These 2 lines are exactly why. Sure, if you are good, you can look at the text version of the JSON file and figure out all the indentations and curly brackets, but for me, using JSONViewer made this much more clear.

One confusion for me was the use of the [0] sections instead of — what I would consider more useful — named sections. Looking at the data in JSONViewer, though, it was easy to follow the structure and then see how to specify the exact data i wanted in the array. For this program I pull out value entitled “duration_in_traffic”, which I found to be a more pessimistic, but more accurate time measurement here in Los Angeles and the summary which provided me the suggested route for the trip. This is very important as there are 3 basic routes for this trip that are possible and traffic conditions can cause the Goole Maps API algorithms to switch between them almost minute-by-minute.
A Few Time Calculations
Now that I have the data I need, I can do some calculations on it for better presentation later.
# Perform Time Calculations
dur_min = duration/60 #convert seconds to minutes
dur_hour = dur_min/60 #convert minutes to decimal number of hours
dur_hm = dur_min % 60 #convert hours to hours and minutes
These lines should be fairly self-explanatory except perhaps for using the modulo operator (%) to give me the proper time output in the form of x hours and y minutes. I vaguely remembered that from a programming class in my ancient past and was able to research it again to use it here.
An OCD fix
# Use correct plural in output
if dur_hour == 1 :
    numhour="Hour"
else:
    numhour="Hours"
This little snippet was added later to get around the situation of using the wring plural when reporting the data. It’s funny how something small like this can annoy you so much. (LAUGH)
Printing the Information
Next comes some simple screen output of the data we received. The program started out with these print statements only until I had everything working the way I wanted. This could be dressed up in many more ways, but this is basically just debug data as the information gets reported in several other ways.
# Output API Duration Information
print "\n"
print "Via "+desc
print "Duration: "+str(dur_min)+" Minutes"
print str(int(dur_hour))+" "+numhour+" and "+str(dur_hm)+" Minutes"
print "\n"
Sample Screen Output from Python program[DEW-Mini:~/Downloads/py] dewelch% python cpp2.py
Via CA-134 E and I-210 EDuration: 58 Minutes0 Hours and 58 Minutes
Congratulations! You've fired the cpp event
[DEW-Mini:~/Downloads/py] dewelch%
Speaking the information
# Build text to speech strings
cpp_sum = "say Current Travel Time to Cal Poly Pomona Using... "+desc
if dur_hour == 0 :
    cpp_time = "say "+str(dur_hm)+" Minutes"
    cpp_time_email = str(dur_hm)+" Minutes"
else:
    cpp_time = "say "+str(int(dur_hour))+" "+numhour+" and "+str(dur_hm)+" Minutes"
    cpp_time_email = str(int(dur_hour))+" "+numhour+" and "+str(dur_hm)+" Minutes"
# Speak Output
system (cpp_sum)
system (cpp_time)
One of my first ideas was to have my Mac speak out the data several times over the course of the morning so that my wife and son would get regular, passive, updates on their potential travel time. This is done using the Mac say command. These lines simply build the appropriate strings which are then executed using the system call. This would need to be altered for other operating systems, as the say command is specific to Mac OS.
Note that, like the OCD Hour/Hours fix above, I make sure to omit the Hours segment if the duration is less than 1 hour. It made it much easier to understand when it was spoken.
Click to hear spoken output from this program
Sending out the data
# Send SMS via IFTTT Maker Channel system ("curl -X POST -H \"Content-Type: application/json\" -d \'{\"value1\":\"" + desc + " - " +cpp_time_email+"\"}\' https://maker.ifttt.com/trigger/cpp/with/key/<ENTERYOURKEYHERE")
print "\n"
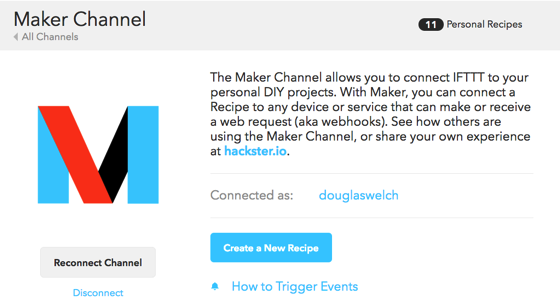
Finally — and most usefully — I send the description and the duration values to IFTTT via the Maker channel. This then allows me to use any of the IFTTT channels to deliver the data however I wish. I can send it via email, text message, iOS notification and more. There are other online systems like iFTTT can be used here, as well. Most of them operate by making a REST call to the URL of the API like this, so it is typically easy to send the data using a relatively simple CURL command. I found that formatting the command, along with all the properly escaped quotation marks, was probably the most difficult parts of this entire program, Sometimes it is the simplest things that catch you up the most.
Future enhancements?
As I mentioned in Part 1, I really like the idea of passive data delivery and this project would lend itself well to that, I think. You could use this script, along with an Arduino or Raspberry Pi to present a “traffic light” interface where the lights would indicate the current travel time conditions. A simple RGB LED would probably suffice. I plan on during just this in the future using my Arduino YUN.
In fact, as a small step towards making this a reality, I ported this Python code to the Linux side of my Arduino YUN and — with the relatively easy additional installation of the simplejson module on the Arduino — I was able to run the code. These means I could then use the data to “bridge” to the Arduino side of the YUN, access any of the digital or analog pins and interface to nearly any device I might wish. My recent acquisition of a Raspberry Pi seems to indicate I could do the same with it.
Again, through the process of developing this simple program I have learned much that can server me in the future, which was exactly what I intended when I started out. I hope this has been both interesting and educational for you. There is surely a lot more that could be done with this program, but I think it was an excellent learning exercise and still today provides some useful data to me and my family.


Comments